Adding User Components to a Game Object
You can add a user component to an object (entity) in two ways: manually, and with the Scene Editor.
Adding a component to an object manually:
const platform = ...;
const move = new HorizontalMove(platform);
move.minX = 100;
move.maxX = 400;
The constructor of the user component HorizontalMove adds the component to the object. You can keep a reference to the component or get the component from the game object, with the getComponent method:
const move = HorizontalMove.getComponent(platform);
However, the interesting is adding components to objects in the Scene Editor.
This is possible in the User Components section. It shows the Add Component button.
When you click that button, it shows a dialog with all the components defined in the project (grouped by the *.components files). Select the one you want to add:
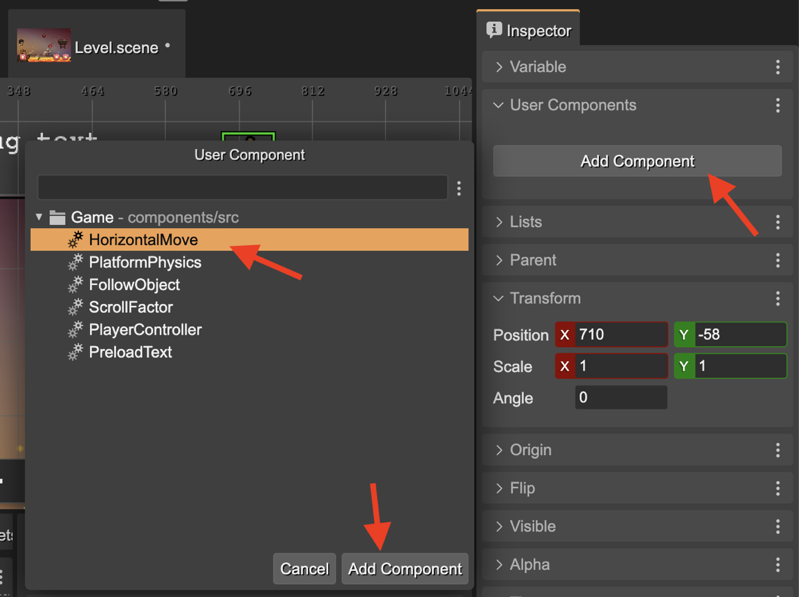
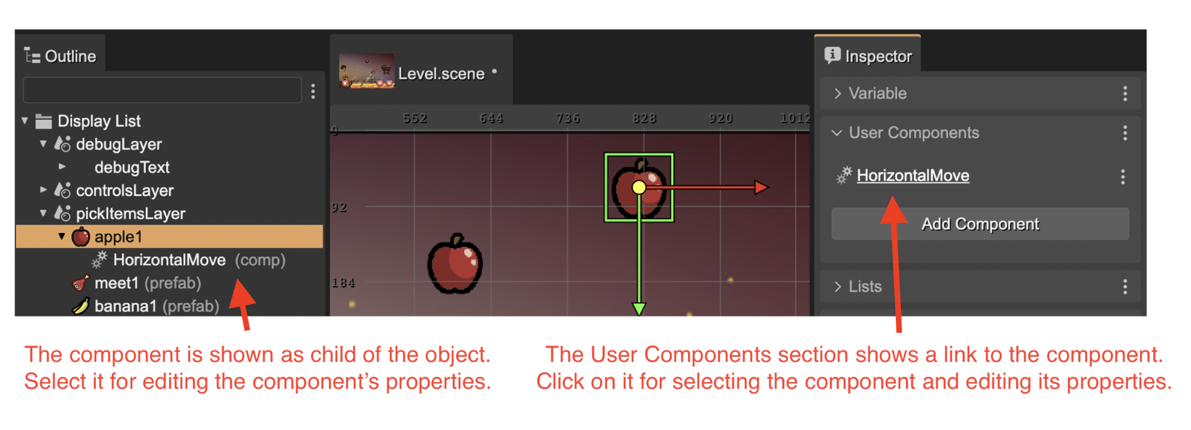
Then, the HorizontalMove component is shown as an object’s child in the Outline view and the User Components section shows a link to the component:
So, when you select the HorizontalMove component, the Inspector view shows the properties of the component:
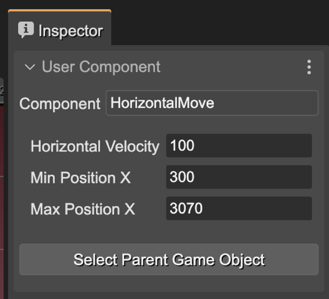
The Select Parent Game Object button is a shortcut for selecting the object containing the component.
Generating the code for a component in an object
The user components compiler will generate the code to create the component, just like if you write it by hand:
// bridge2 (components)
const bridge2HorizontalMove = new HorizontalMove(bridge2);
bridge2HorizontalMove.horizVelocity = 100;
bridge2HorizontalMove.minX = 10;
bridge2HorizontalMove.maxX = 400;
Actions for a component
These are the actions associated to the user component of an object:
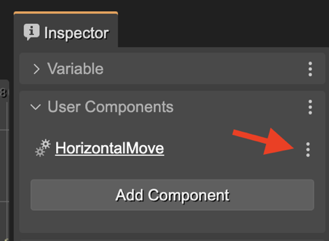
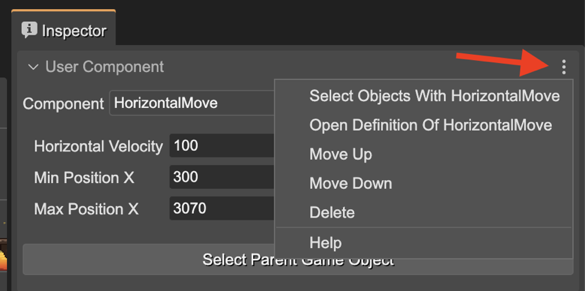
Select Objects With HorizontalMove: selects in the scene all objects containing the HorizontalMove component.
Open Definition Of HorizontalMove: opens the definition of the component in the User Components Editor.
Move Up, Move Down: changes the order of the component.
Delete: deletes the component from the object.